Factory Method Design Pattern – C# – Kullanımı – Nedir

Factory Method Design Pattern nesne oluşturma sürecini soyutlar.

Run Time esnasında ihtiyaç olduğunda oluşturma mantığını ortaya çıkarmadan nesne oluşturmak için kullanılır.
Nesneyi oluşturma için interface kullanılır.

1 – Interface : Örnek IVehicle
Nesne oluşturma için interface.

2 – Class : Örnek Car, Bus
IVehicle interface gerçekleştiren sınıf.

3 – Abstract Class : Factory Method bildirirlir.
Method, IVehicle türünde değer döner.

4 – Class : Car veya Bus’ın nesnelerini dönmek için Factory metotu overrride eder.

interface IVehicle
{
}
class Car : IVehicle
{
}
class Bus : IVehicle
{
}
abstract class VehicleFactory
{
	public abstract IVehicle FactoryMethod ( string type );
}

class AltSınıf : VehicleFactory
{
	public override IVehicle FactoryMethod ( string type )
	{
		switch ( type )
		{
			case “Car” :
				return Car();
			case “Bus”
				return Bus();
			
		}
	}
}  

Düzenleme
Drive metotu ekleme

interface IVehicle
{
	void Drive ( int km )
}
class Car : IVehicle
{
	public void Drive( int km )
	{ Console.WriteLine(“Car km : ” + km.ToString()) }
}


class Bus : IVehicle
{
	public void Drive( int km )
	{ Console.WriteLine(“Bus km : ” + km.ToString()) }

}
abstract class VehicleFactory
{
	public abstract IVehicle GetVehicle ( string vehicle );
}

class AltSınıf : VehicleFactory
{
	public override IVehicle GetVehicle ( string vehicle )
	{
		switch ( vehicle )
		{
			case “Car” :
				return Car();
			case “Bus”
				return Bus();
			
		}
	}
}  

class Program
{
	static void Main(string[] args)
	{
		VehicleFactory factory = new AltSınıf();
		IVehicle car = factory.GetVehicle(“Car”);
		car.Drive(20);
		IVehicle bus = factory.GetVehicle(“Bus”);
		bus.Drive(10);
		Console.ReadKey();
	}
}

Output :
Car km : 20
Bus km : 10

VehicleFactory abstract sınıfı hangi sınıf oluşturulacağını bilmeyecek.

Xamarin.Forms UI Düzenleme

Happy projemizin devamına uyguluyorum.

https://github.com/cihanasn/Happy

https://cihanasan.wordpress.com/2020/04/02/xamarin-forms-sqlite-veritabani-select-ve-insert/ ve https://cihanasan.wordpress.com/2020/04/03/xamarin-forms-sqlite-veritabani-ekle-sil-ve-guncelle/ bu makalelerimde Happy projesi kurulumu anlatılmaktadır.


Free UI Kits için bu siteden bakabilirsiniz.

https://snppts.dev

Aşağıdaki linkte basit bir template vardır. Bunu Happy projeme uygulayacağım.

https://snppts.dev/snippet/initials-view


Adım 1 : Happy proje dizinine Controls klasörü açınız.

Adım 2 : Solution Explorer’dan Happy proje sağ click Add > New Item > Content View seçeneğini seçerek InitialsView.xaml ekleyiniz.

<?xml version="1.0" encoding="UTF-8"?>

<ContentView xmlns="http://xamarin.com/schemas/2014/forms"

             xmlns:x="http://schemas.microsoft.com/winfx/2009/xaml"

             xmlns:d="http://xamarin.com/schemas/2014/forms/design"

             xmlns:mc="http://schemas.openxmlformats.org/markup-compatibility/2006"

             mc:Ignorable="d"

             x:Class="Happy.Controls.InitialsView">

    <ContentView.Content>

        <Grid>

            <BoxView x:Name="ContentBoxView"

                     VerticalOptions="Center"

                     HorizontalOptions="Center" />

            <Label x:Name="ContentLabel"

                   VerticalOptions="Center"

                   HorizontalOptions="Center" />

        </Grid>

    </ContentView.Content>

</ContentView>

Adım 3 : InitialsView.xaml.cs

using System;

using System.Collections.Generic;

using System.Linq;

using System.Text;

using System.Threading.Tasks;


using Xamarin.Forms;

using Xamarin.Forms.Xaml;


namespace Happy.Controls

{

    [XamlCompilation(XamlCompilationOptions.Compile)]

    public partial class InitialsView : ContentView

    {

        public static readonly BindableProperty DefaultBackgroundColorProperty

            = BindableProperty.Create(nameof(DefaultBackgroundColor), typeof(Color), typeof(InitialsView), Color.LightGray);


        public Color DefaultBackgroundColor

        {

            get => (Color)GetValue(DefaultBackgroundColorProperty);

            set => SetValue(DefaultBackgroundColorProperty, value);

        }


        public static readonly BindableProperty TextColorLightProperty

            = BindableProperty.Create(nameof(TextColorLight), typeof(Color), typeof(InitialsView), Color.White);


        public Color TextColorLight

        {

            get => (Color)GetValue(TextColorLightProperty);

            set => SetValue(TextColorLightProperty, value);

        }


        public static readonly BindableProperty TextColorDarkProperty

            = BindableProperty.Create(nameof(TextColorDark), typeof(Color), typeof(InitialsView), Color.Black);


        public Color TextColorDark

        {

            get => (Color)GetValue(TextColorDarkProperty);

            set => SetValue(TextColorDarkProperty, value);

        }


        public static readonly BindableProperty NameProperty

            = BindableProperty.Create(nameof(Name), typeof(string), typeof(InitialsView), string.Empty, propertyChanged: OnNamePropertyChanged);


        public string Name

        {

            get => (string)GetValue(NameProperty);

            set => SetValue(NameProperty, value);

        }


        private static void OnNamePropertyChanged(BindableObject bindable, object oldValue, object newValue)

        {

            if (!(bindable is InitialsView initialsView))

                return;


            initialsView.SetName((string)newValue);

        }


        private void SetName(string name)

        {

            if (string.IsNullOrEmpty(name))

            {

                ContentLabel.Text = string.Empty;

                ContentBoxView.BackgroundColor = DefaultBackgroundColor;

                return;

            }


            var words = name.Split(new[] { ' ' }, StringSplitOptions.RemoveEmptyEntries);

            if (words.Length == 1)

            {

                ContentLabel.Text = words[0][0].ToString();

            }

            else if (words.Length > 1)

            {

                var initialsString = words[0][0].ToString() + words[words.Length - 1][0].ToString();

                ContentLabel.Text = initialsString;

            }

            else

            {

                ContentLabel.Text = string.Empty;

            }


            SetColors(name);

        }


        public InitialsView()

        {

            InitializeComponent();

        }


        protected override void OnParentSet()

        {

            base.OnParentSet();


            if (WidthRequest == -1 || HeightRequest == -1)

            {

                InitControl(50);

            }

            else

            {

                InitControl(Math.Min(WidthRequest, HeightRequest));

            }

        }


        private void SetColors(string name)

        {

            // get color for the provided name

            var hexColor = "#FF" + Convert.ToString(name.GetHashCode(), 16).Substring(0, 6);


            // fix issue if value is to short

            if (hexColor.Length == 8)

                hexColor += "5";


            // create color from hex value

            var color = Color.FromHex(hexColor);


            // set backgroundcolor of contentboxview

            ContentBoxView.BackgroundColor = color;


            // get brothness and set textcolor

            var brightness = color.R * .3 + color.G * .59 + color.B * .11;

            ContentLabel.TextColor = brightness < 0.5 ? TextColorLight : TextColorDark;

        }


        private void InitControl(double size)

        {

            // set width and height of contentboxview

            ContentBoxView.HeightRequest = size;

            ContentBoxView.WidthRequest = size;


            // calculate corner radius of contentboxview

            ContentBoxView.CornerRadius = size / 2;


            // set default background

            ContentBoxView.BackgroundColor = DefaultBackgroundColor;


            // set fontsize

            ContentLabel.FontSize = (size / 2) - 5;


            // check if name is already present

            if (!string.IsNullOrEmpty(Name))

                SetName(Name);

        }

    }

}

Bu yukarıdaki kodları yukarıdaki koddan copy paste ettim. Sadece namespace isimlerini değiştirdim.

Adım 4 : MainPage.xaml dosyasında bulunan Enrty Name özelliği txtName yerine NameEntry yazıyorum.

MainPage.xaml.cs dosyasında da aynı değiştirmeyi yapıyorum. txtName yerine NameEntry yazıyorum.

GetItemsAsync() metotlarını kaldırdım. MainPage.xaml.cs dosyası güncelleyiniz.

using System;

using System.Collections.Generic;

using System.ComponentModel;

using System.Threading.Tasks;

using Xamarin.Forms;


namespace Happy

{


    // Learn more about making custom code visible in the Xamarin.Forms previewer

    // by visiting https://aka.ms/xamarinforms-previewer

    [DesignTimeVisible(false)]

    public partial class MainPage : ContentPage

    {

        public MainPage()

        {

            InitializeComponent();

        }


        private async void BtnAdd_Clicked(object sender, EventArgs e)

        {

            if (string.IsNullOrEmpty(NameEntry.Text))

            {

                await DisplayAlert("Zorunlu", "Lütfen İsim Giriniz!", "TAMAM");

            }

            else

            {

                Person p1 = new Person()

                {

                    Name = NameEntry.Text,


                };


                SQLiteHelper helper = new SQLiteHelper();


                await helper.SaveItemAsync(p1);

                NameEntry.Text = string.Empty;

                await DisplayAlert("Başarılı", "Kişi başarılı olarak eklenmiştir.", "TAMAM");


                App.Current.MainPage = new MainPage(); //To reset UI


            }

        }


        private async void BtnUpdate_Clicked(object sender, EventArgs e)

        {

            if (string.IsNullOrEmpty(txtId.Text))

            {

                await DisplayAlert("Zorunlu", "Lütfen Id Giriniz", "TAMAM");


            }

            else

            {

                Person person = new Person()

                {

                    Id = Convert.ToInt32(txtId.Text),

                    Name = NameEntry.Text

                };


                SQLiteHelper helper = new SQLiteHelper();


                await helper.SaveItemAsync(person);


                txtId.Text = string.Empty;

                NameEntry.Text = string.Empty;

                await DisplayAlert("Başarılı", "Kişi başarılı olarak güncellenmiştir.", "TAMAM");


                App.Current.MainPage = new MainPage(); //To reset UI

            }

        }


        private async void BtnDelete_Clicked(object sender, EventArgs e)

        {

            if (string.IsNullOrEmpty(txtId.Text))

            {

                await DisplayAlert("Zorunlu", "Lütfen Id Giriniz", "TAMAM");

            }

            else

            {


                SQLiteHelper helper = new SQLiteHelper();


                var person = await helper.GetItemAsync(Convert.ToInt32(txtId.Text));

                if (person != null)

                {


                    await helper.DeleteItemAsync(person);

                    txtId.Text = string.Empty;

                    await DisplayAlert("Başarılı", "Kişi başarılı olarak silindi.", "TAMAM");


                    App.Current.MainPage = new MainPage(); //To reset UI

                }

            }

        }

    }

}

Adım 5 : Bu adımdan sonra Kişi Listesi için çalışma yapıldı. Person.cs güncellendi.

using SQLite;

using System.ComponentModel;


namespace Happy

{

    public class Person : INotifyPropertyChanged

    {


        private int _id;

        private string _name;

        [PrimaryKey, AutoIncrement]

        public int Id

        {

            get { return _id; }

            set { _id = value; NotifyPropertyChanged(); }

        }


        public string Name

        {

            get { return _name; }

            set { _name = value; NotifyPropertyChanged(); }

        }


        public event PropertyChangedEventHandler PropertyChanged;

        public void NotifyPropertyChanged([System.Runtime.CompilerServices.CallerMemberName] string propertyName = "")

        {

            if (this.PropertyChanged != null)

                this.PropertyChanged(this, new PropertyChangedEventArgs(propertyName));

        }

    }

}

Adım 6 : Kişi Listesi için Happy projesine ViewModel.cs sınıfı ekleyiniz.

using System;

using System.Collections.Generic;

using System.ComponentModel;

using System.Text;

using System.Threading.Tasks;


namespace Happy

{

    public class ViewModel

    {

        public ViewModel()

        {

            this.GetList();

        }


        public List<Person> List { get; set; }


        private void GetList()

        {

            if (this.List == null)

                this.List = new List<Person>();


            SQLiteHelper helper = new SQLiteHelper();


            Task<List<Person>> personList = helper.GetItemsAsync();

            personList.Wait();

            this.List = personList.Result;

            if (personList.Result.Count > 0)

            {


                this.List = personList.Result;

            }

        }

    }

}

Adım 7 : MainPage.xaml dosyasını güncelleyiniz. Aşağıdaki kodda StackLayout BindableLayout ile ContentPage.BindingContext ilişkilidir.

ContentPage.BindingContext içerisinde ViewModel, ViewModel.cs sınıfını belirtmektedir.

StackLayout BindableLayout sayesinde Kişi Listesi UI tarafta gösteriliyor.

ViewModel.cs dosyasında Person.cs sınıfı kullanılmıştır. Bundan dolayı gerekli düzenleme bu sınıf içinde yapılmıştır.

<?xml version="1.0" encoding="utf-8" ?>

<ContentPage xmlns="http://xamarin.com/schemas/2014/forms"

             xmlns:x="http://schemas.microsoft.com/winfx/2009/xaml"

             xmlns:d="http://xamarin.com/schemas/2014/forms/design"

             xmlns:mc="http://schemas.openxmlformats.org/markup-compatibility/2006"

             xmlns:controls="clr-namespace:Happy.Controls"

             xmlns:local="clr-namespace:Happy"

             mc:Ignorable="d"

             Visual="Material"

             x:Class="Happy.MainPage"


             >

    <ContentPage.BindingContext>

        <local:ViewModel />

    </ContentPage.BindingContext>


    <StackLayout Spacing="12"

                 VerticalOptions="Start"

                 HorizontalOptions="Center">


        <controls:InitialsView WidthRequest="250"

                               HeightRequest="250"

                               Name="{Binding Text, Source={x:Reference NameEntry}}" />


        <Entry x:Name="txtId" Placeholder="Id Giriniz"></Entry>

        <Entry x:Name="NameEntry" Placeholder="İsim Giriniz"></Entry>

        <StackLayout  HorizontalOptions="CenterAndExpand" Orientation="Horizontal">

            <Button x:Name="btnAdd" WidthRequest="150" Text="Ekle" Clicked="BtnAdd_Clicked" />

            <Button x:Name="btnUpdate" WidthRequest="150" Text="Güncelle" Clicked="BtnUpdate_Clicked"/>

        </StackLayout>

        <StackLayout HorizontalOptions="CenterAndExpand" Orientation="Horizontal">

            <Button x:Name="btnDelete" WidthRequest="300" Text="Sil" Clicked="BtnDelete_Clicked" />


        </StackLayout>


        <StackLayout BindableLayout.ItemsSource="{Binding List, Mode=OneWay}"    

                 VerticalOptions="Center" HorizontalOptions="Center" WidthRequest="300" BackgroundColor="AliceBlue">

            <BindableLayout.ItemTemplate>

                <DataTemplate>

                    <Grid>

                        <Grid.RowDefinitions>

                            <RowDefinition Height="Auto"/>

                            <RowDefinition Height="0.5"/>

                        </Grid.RowDefinitions>

                        <Grid.ColumnDefinitions>

                            <ColumnDefinition Width="50" />

                            <ColumnDefinition Width="*" />

                        </Grid.ColumnDefinitions>

                        <Label Grid.Column="0" Text= "{Binding Id}" FontSize="Medium" FontFamily="serif-monospace"></Label>

                        <Label Grid.Column="1" Text="{Binding Name}" FontSize="Medium" FontFamily="serif-monospace" TextColor="YellowGreen"></Label>

                    </Grid>

                </DataTemplate>

            </BindableLayout.ItemTemplate>

        </StackLayout>


    </StackLayout>


</ContentPage>


Adım 8 : Uygulamayı Start ediniz.

Xamarin.Forms Web API Kullanımı – GET

Xamarin.Forms uygulamalarına Web API nasıl bağlanır? Rest API ile veri nasıl alınır?

Sadece Http verbs GET kullandım.

https://github.com/cihanasn/EmployeeApp

İnternetten free public bir api yayınlayan site buldum.

http://dummy.restapiexample.com

API json olarak Employee sınıfının değerlerini dönmektedir. API’yi kullanarak Xamarin.Forms mobil uygulaması gerçekleştirecem.

Adım 1 : Open Visual Studio 2019 Community

Adım 2 : Create a new project seçeneğini seçiniz.

Adım 3 : Mobile App (Xamarin.Forms) seçeneğini seçiniz.

Adım 4 : Proje ismine EmployeeApp veriniz.

Adım 5 : Gelen pencereden Blank template seçiniz.

Adım 6 : http://dummy.restapiexample.com/employees linkten oluşturacağım Model sınıfımın özelliklerini öğreniyorum.

Örnek bir JSON notasyonu aşağıdaki gibidir.

{

"status": "success",

"data": [

     {

     "id": "1",

     "employee_name": "Tiger Nixon",

     "employee_salary": "320800",

     "employee_age": "61",

     "profile_image": ""

     },

     ....

     ]

}

JSON notasyonumuzu class yapısına çevirelim.

Aşağıdaki sınıflar ortaya çıkmaktadır.

EmployeeApp projesi üzerine sağ click Add > New Item > Class Employee.cs sınıfı proje dizinine ekleyiniz.

Aşağıdaki kod, JSON notasyonundaki data kısmına karşılık gelmektedir.

    public class Employee

    {

        public string id { get; set; }

        public string employee_name { get; set; }

        public string employee_salary { get; set; }

        public string employee_age { get; set; }

        public string profile_image { get; set; }

    }

status değerini almak ve birden fazla gelen Employee objesini almak için GetEmployeesDTO.cs adında sınıf EmployeeApp projesi dizininde oluşturacağım.

    public class GetEmployeesDTO

    {

        public string status { get; set; }

        public List<Employee> data { get; set; }

    }

Yukarıda Employee listesi mobil uygulamamızın ListView kontrolünde görüntülenecek.

Adım 7 : Double Click MainPage.xaml dosyasına. Aşağıdaki kodu ile dosyanızı güncelleyiniz.

<?xml version="1.0" encoding="utf-8" ?>

<ContentPage xmlns="http://xamarin.com/schemas/2014/forms"

             xmlns:x="http://schemas.microsoft.com/winfx/2009/xaml"

             xmlns:d="http://xamarin.com/schemas/2014/forms/design"

             xmlns:mc="http://schemas.openxmlformats.org/markup-compatibility/2006"

             mc:Ignorable="d"

             x:Class="EmployeeApp.MainPage">


    <StackLayout>

        <!-- Place new controls here -->

        <Label x:Name="lblStatus"

           HorizontalOptions="Center"

           VerticalOptions="CenterAndExpand" />

        <ListView x:Name="lstEmployees">

            <ListView.ItemTemplate>

                <DataTemplate>

                    <ViewCell>

                        <StackLayout Orientation="Horizontal">

                            <Label Text="{Binding id}"></Label>

                            <Label Text="{Binding employee_name}"></Label>

                            <Label Text="{Binding employee_salary}"></Label>

                            <Label Text="{Binding employee_age}"></Label>

                        </StackLayout>

                    </ViewCell>

                </DataTemplate>

            </ListView.ItemTemplate>

        </ListView>

    </StackLayout>


</ContentPage>

Adım 8 : Veriyi alma ve HTTP request’leri yönetmek için Newtonsoft.Json NuGet package ekleyiniz. Bu paket JSON notasyonunu .NET türlerine(types) çevirme için metotlar sağlar.

EmployeeApp projesine sağ click Manage NuGet packages … seçeneği seçiniz. Gelen ekrandan Browse sekmesine tıklayınız.

Install butonuna tıklayınız.

MainPage.xaml.cs sınıfına Mobil uygulamanın ekranı visible olmadan önce tetiklenen ve overridden edilebilen OnAppearing() metotunu ekleyelim.

using Newtonsoft.Json;

using System.ComponentModel;

using System.Net.Http;

using Xamarin.Forms;


namespace EmployeeApp

{

    // Learn more about making custom code visible in the Xamarin.Forms previewer

    // by visiting https://aka.ms/xamarinforms-previewer

    [DesignTimeVisible(false)]

    public partial class MainPage : ContentPage

    {

        public MainPage()

        {

            InitializeComponent();

        }


        protected async override void OnAppearing()

        {

            base.OnAppearing();


            var client = new HttpClient();

            var json = await client.GetStringAsync("https://dummy.restapiexample.com/api/v1/employees");

            GetEmployeesDTO result = JsonConvert.DeserializeObject<GetEmployeesDTO>(json);


            lstEmployees.ItemsSource = result.data;

            lblStatus.Text = result.status;

        }

    }

}

Adım 9 : Uygulamayı Start ediniz.

Happy Coding 🙂

Xamarin.Forms SQLite Veritabanı Ekle, Sil ve Güncelle

Bu makale https://cihanasan.wordpress.com/2020/04/02/xamarin-forms-sqlite-veritabani-select-ve-insert/ devamıdır.

https://github.com/cihanasn/Happy

Adım 1 : MainPage.xaml dosyasına txtName ve btnAdd aşağıdaki gibi ekleyiniz.

        <StackLayout HorizontalOptions="Center" VerticalOptions="Start">

            <Entry x:Name="txtName" Placeholder="İsim Giriniz"></Entry>

            <StackLayout  HorizontalOptions="CenterAndExpand" Orientation="Horizontal">

                <Button x:Name="btnAdd" WidthRequest="250" Text="Ekle" Clicked="BtnAdd_Clicked" />  

            </StackLayout>

            <ListView x:Name="lstPersons">

                <ListView.ItemTemplate>

                    <DataTemplate>

                        <TextCell Text="{Binding Name}" Detail="{Binding Id}"></TextCell>

                    </DataTemplate>

                </ListView.ItemTemplate>

            </ListView>

        </StackLayout>

Adım 2 : SQLite Veritabanına veriyi eklemek için MainPage.xaml.cs dosyasına aşağıdaki BtnAdd_Clicked metotu ekleyiniz.

        private async void BtnAdd_Clicked(object sender, EventArgs e)

        {

            if (string.IsNullOrEmpty(txtName.Text))

            {

                await DisplayAlert("Zorunlu", "Lütfen İsim Giriniz!", "TAMAM");           

            }

            else

            {

                Person p1 = new Person()

                {

                    Name = txtName.Text

                };


                SQLiteHelper helper = new SQLiteHelper();


                await helper.SaveItemAsync(p1);

                txtName.Text = string.Empty;

                await DisplayAlert("Başarılı", "Kişi başarılı olarak eklenmiştir.", "TAMAM");


                var personList = await helper.GetItemsAsync();

                if (personList != null)

                {

                    lstPersons.ItemsSource = personList;

                }

            }

        }

Adım 3 : Uygulamayı Start ediniz.

Step 4 : SQLite Veritabanındaki veriyi Person sınıfının Id özelliğini kullanarak güncellemek istiyorum.

MainPage.xaml dosyasına txtId ve btnUpdate ekleyiniz.

        <StackLayout HorizontalOptions="Center" VerticalOptions="Start">

            <Entry x:Name="txtId" Placeholder="Id Giriniz"></Entry>

            <Entry x:Name="txtName" Placeholder="İsim Giriniz"></Entry>

            <StackLayout  HorizontalOptions="CenterAndExpand" Orientation="Horizontal">

                <Button x:Name="btnAdd" WidthRequest="150" Text="Ekle" Clicked="BtnAdd_Clicked" />

                <Button x:Name="btnUpdate" WidthRequest="150" Text="Güncelle" Clicked="BtnUpdate_Clicked"/>

            </StackLayout>

            <ListView x:Name="lstPersons">

                <ListView.ItemTemplate>

                    <DataTemplate>

                        <TextCell Text="{Binding Name}" Detail="{Binding Id}"></TextCell>

                    </DataTemplate>

                </ListView.ItemTemplate>

            </ListView>

        </StackLayout>


Step 5 : MainPage.xaml.cs dosyasına aşağıdaki BtnUpdate_Clicked metotu ekleyiniz.

        private async void BtnUpdate_Clicked(object sender, EventArgs e)

        {

            if (string.IsNullOrEmpty(txtId.Text))

            {

                await DisplayAlert("Zorunlu", "Lütfen Id Giriniz", "TAMAM");


            }

            else

            {

                Person person = new Person()

                {

                    Id = Convert.ToInt32(txtId.Text),

                    Name = txtName.Text

                };


                SQLiteHelper helper = new SQLiteHelper();


                await helper.SaveItemAsync(person);


                txtId.Text = string.Empty;

                txtName.Text = string.Empty;

                await DisplayAlert("Başarılı", "Kişi başarılı olarak güncellenmiştir.", "TAMAM");


                var personList = await helper.GetItemsAsync();

                if (personList != null)

                {

                    lstPersons.ItemsSource = personList;

                }

            }

        }


Button’ların WidthRequest=”150″ yaptım.


Step 6 : Uygulamayı Start ediniz.

Step 7 : SQLite Veritabanından veriyi silmek için MainPage.xaml dosyası aşağıdaki gibi btnDelete ekleyiniz.

        <StackLayout HorizontalOptions="Center" VerticalOptions="Start">

            <Entry x:Name="txtId" Placeholder="Id Giriniz"></Entry>

            <Entry x:Name="txtName" Placeholder="İsim Giriniz"></Entry>

            <StackLayout  HorizontalOptions="CenterAndExpand" Orientation="Horizontal">

                <Button x:Name="btnAdd" WidthRequest="150" Text="Ekle" Clicked="BtnAdd_Clicked" />

                <Button x:Name="btnUpdate" WidthRequest="150" Text="Güncelle" Clicked="BtnUpdate_Clicked"/>

            </StackLayout>

            <StackLayout HorizontalOptions="CenterAndExpand" Orientation="Horizontal">

                <Button x:Name="btnDelete" WidthRequest="300" Text="Sil" Clicked="BtnDelete_Clicked" />

            </StackLayout>

            <ListView x:Name="lstPersons">

                <ListView.ItemTemplate>

                    <DataTemplate>

                        <TextCell Text="{Binding Name}" Detail="{Binding Id}"></TextCell>

                    </DataTemplate>

                </ListView.ItemTemplate>

            </ListView>

        </StackLayout>

Step 8 : MainPage.xaml.cs dosyasına aşağıdaki BtnDelete_Clicked metotunu ekleyiniz.

        private async void BtnDelete_Clicked(object sender, EventArgs e)

        {

            if (string.IsNullOrEmpty(txtId.Text))

            {

                await DisplayAlert("Zorunlu", "Lütfen Id Giriniz", "TAMAM");

            }

            else

            {


                SQLiteHelper helper = new SQLiteHelper();


                var person = await helper.GetItemAsync(Convert.ToInt32(txtId.Text));

                if (person != null)

                {


                    await helper.DeleteItemAsync(person);

                    txtId.Text = string.Empty;

                    await DisplayAlert("Başarılı", "Kişi başarılı olarak silindi.", "TAMAM");


                    var personList = await helper.GetItemsAsync();

                    if (personList != null)

                    {

                        lstPersons.ItemsSource = personList;

                    }

                }

            }

        }

Step 9 : Uygulamayı Start ediniz.

Happy Coding 🙂

Xamarin.Forms SQLite Veritabanı Select ve Insert

Herbir platformun kendi dosya sistemi(filesystem) vardır. Dosya yazdırma ve okuma native file APIs kullanarak kolayca yapılır.


SQLite, küçük ve hızlı veritabanıdır. Dünyada en çok kullanılan veritabanıdır.


Windows 10 Pro ve Visual Studio 2019 Community kullanacağım.

https://github.com/cihanasn/Happy

Step 1 : Xamarin.Forms Project Oluşturma

Mobile App (Xamarin.forms) seçiniz.

Uygulamaya “Happy” ismini veriniz.

Ardından gelen ekranda Blank seçeneğini seçiniz.

Uygulamayı start ediniz.

Step 2 : sqlite-net-pc NuGet package indirin.

Step 3 : Bir sınıf oluşturun.

Bir tablo oluşturmak için Happy proje altında Person.cs adında bir class oluşturun.

using SQLite;


namespace Happy

{

    public class Person

    {

        [PrimaryKey, AutoIncrement]

        public int Id { get; set; }

        public string Name { get; set; }

    }

}

Step 4 : SQLiteHelper adında Happy proje altında sınıf oluşturun.


using SQLite;

using System;

using System.Collections.Generic;

using System.IO;

using System.Threading.Tasks;


namespace Happy

{

    public class SQLiteHelper

    {

        SQLiteAsyncConnection con;

        public SQLiteHelper()

        {

            con = new SQLiteAsyncConnection(Path.Combine(Environment.GetFolderPath(Environment.SpecialFolder.LocalApplicationData), " HappySQLite.db3"));

            con.CreateTableAsync<Person>().Wait();

        }


        //Insert and Update

        public Task<int> SaveItemAsync(Person person)

        {

            if (person.Id != 0)

            {

                return con.UpdateAsync(person);

            }

            else

            {

                return con.InsertAsync(person);

            }

        }


        //Delete

        public Task<int> DeleteItemAsync(Person person)

        {

            return con.DeleteAsync(person);

        }


        //Read All Items

        public Task<List<Person>> GetItemsAsync()

        {

            return con.Table<Person>().ToListAsync();

        }


        //Read Item

        public Task<Person> GetItemAsync(int personId)

        {

            return con.Table<Person>().Where(i => i.Id == personId).FirstOrDefaultAsync();

        }

    }

Step 5 : MainPage.xaml aşağıdaki kodu yapıştırın.

<?xml version="1.0" encoding="utf-8" ?>

<ContentPage xmlns="http://xamarin.com/schemas/2014/forms"

             xmlns:x="http://schemas.microsoft.com/winfx/2009/xaml"

             xmlns:d="http://xamarin.com/schemas/2014/forms/design"

             xmlns:mc="http://schemas.openxmlformats.org/markup-compatibility/2006"

             mc:Ignorable="d"

             x:Class="Happy.MainPage">


    <StackLayout>


        <!-- Place new controls here -->

        <Label Text="Welcome to Xamarin.Forms!"

           HorizontalOptions="Center"

           VerticalOptions="CenterAndExpand" />

        <StackLayout HorizontalOptions="Center" VerticalOptions="Start">

            <ListView x:Name="lstPersons">

                <ListView.ItemTemplate>

                    <DataTemplate>

                        <TextCell Text="{Binding Name}" Detail="{Binding Id}"></TextCell>

                    </DataTemplate>

                </ListView.ItemTemplate>

            </ListView>

        </StackLayout>


    </StackLayout>


</ContentPage>

Step 6 : MainPage.xaml.cs gidiniz. Aşağıdaki kodu ekleyiniz.


        protected async override void OnAppearing()

        {

            base.OnAppearing();


            SQLiteHelper helper = new SQLiteHelper();


            //Get All Persons

            var personList = await helper.GetItemsAsync();

            if (personList.Count > 0)

            {

                lstPersons.ItemsSource = personList;

            }

            else

            {

                //Add two man to DB

                Person p1 = new Person();

                p1.Name = "Cihan";

                await helper.SaveItemAsync(p1);


                Person p2 = new Person();

                p2.Name = "Beste";

                await helper.SaveItemAsync(p2);


                personList.Add(p1);

                personList.Add(p2);

                lstPersons.ItemsSource = personList;

            }


        }

OnAppearing() metotu overridden ettim. Sayfa görünür(visible) olmadan önce bu fonksiyon tetiklenir.

Step 7 : Start the app.

Debuglama yoluyla ikinci defa Start ettiğimde SQLite ile HappySQLite.db3 veritabanından değer aldığını görüyorum.

Happy coding 🙂

Xamarin Basit Uygulama

https://howtodevelop.net/article/24/xamarin-simple-application

Xamarin, .NET ile Windows, Android ve iOS için uygulama yapmak için açık kaynak platformdur.

Xamarin uygulamaları PC veya Mac üzerinde yazılabilir. Native uygulama paketleri içerisinde derlenir. Şimdilik iOS için uygulamaları deploy etme veya derleme, MacOS makinasını ister.

Xamarin, herbir platformda native UI oluşturmanıza ve C#’da business logic yazmanıza izin verir.

Bu makalede, alfanumerik telefon numaralarını çeviren bir uygulama oluşturacağız.

Bu uygulamayı yapmak için Windows 10 işletim sistemi gereklidir.

Visual Studio 2019 Community kullanılmıştır.

Xamarin.Android, Java Development Kit(JDK) ve Android SDK kullanır.

https://docs.microsoft.com/en-us/xamarin/android/get-started/hello-android/hello-android-quickstart?pivots=windows Microsoft’un makalesini adım adım uyguladım.

  1. Adım : Visual Studio 2019 installer’dan Xamarin indirilebilir.

  1. Adım : Mobile development with .NET seçeneğini seçiniz.

  1. Adım : Android 9 için Ayarlar > Telefon kakkında > Yazılım bilgileri > Yapım numarasına 7 defa dokunduktan sonra “You are now a developer!” görmeniz gerekiyor. Artık telefonunuz ile Debuglama yapmayı etkin hale getirdiniz.
  2. Adım : USB Debugging etkin hale getiriniz. Ayarlar > Geliştirici seçenekleri > USB hata ayıklama
  3. Adım : Telefonunuzu USB ile bilgisayarınıza bağladıktan sonra Visual Studio 2019 Community Start butonu aşağıdaki gibi görünmeli.(Telefonunuz bilgisayara bağlandığında telefonunuzda erişme ve USD debuglamaya izin verme ekranları gelecektir.)

  1. Adım : Projeyi oluşturunuz.

New Project penceresinden Android App template seçiniz. Phoneword olarak projeyi isimlendiriniz.

Create butonuna tıklayınız.

Gelen ekrandan Blank App seçeneğini seçiniz.

  1. Adım : Layout oluşturunuz.

active_main.xml dosyası layout dosyasıdır. RelativeLayout yerine LinearLayout yazınız. LinearLayout açık etiketi android:orientation=”vertical” ekleyiniz.

<?xml version="1.0" encoding="utf-8"?>

<LinearLayout xmlns:android="http://schemas.android.com/apk/res/android"

    xmlns:app="http://schemas.android.com/apk/res-auto"

    xmlns:tools="http://schemas.android.com/tools"

    android:layout_width="match_parent"

    android:layout_height="match_parent"

    android:orientation="vertical">

</LinearLayout>

Toolbox’dan dizayn yüzeyine Text sürükleyiniz.

Seçilmiş Text widget’ın özelliklerinde Text özelliğine “Enter a Phoneword” yazınız.

Toolbox’dan Plain Text sürükleyiniz.

Yukarıda gösterildiği gibi Button widget sürükleyiniz. Özelliklerinden Text özelliğini Translate ve id özelliğine @+id/TranslateButton yazınız.

Toolbox’dan TextView widget sürükleyiniz. Özelliklerden Text özelliğini boş bırakınız. id özelliğini @+id/TranslatedPhoneword yazınız.

  1. Adım Proje üzeri sağ click tıklayınız. Add > New Item

Sol menüden Visual C# > Code > Code File seçiniz. PhoneTranslator.cs olarak isimlendiriniz.

Aşağıdaki kodu ekleyiniz.

using System.Text;

using System;

namespace Core

{

    public static class PhonewordTranslator

    {

        public static string ToNumber(string raw)

        {

            if (string.IsNullOrWhiteSpace(raw))

                return "";

            else

                raw = raw.ToUpperInvariant();


            var newNumber = new StringBuilder();

            foreach (var c in raw)

            {

                if (" -0123456789".Contains(c))

                {

                    newNumber.Append(c);

                }

                else

                {

                    var result = TranslateToNumber(c);

                    if (result != null)

                        newNumber.Append(result);

                }

                // otherwise we've skipped a non-numeric char

            }

            return newNumber.ToString();

        }

        static bool Contains (this string keyString, char c)

        {

            return keyString.IndexOf(c) >= 0;

        }

        static int? TranslateToNumber(char c)

        {

            if ("ABC".Contains(c))

                return 2;

            else if ("DEF".Contains(c))

                return 3;

            else if ("GHI".Contains(c))

                return 4;

            else if ("JKL".Contains(c))

                return 5;

            else if ("MNO".Contains(c))

                return 6;

            else if ("PQRS".Contains(c))

                return 7;

            else if ("TUV".Contains(c))

                return 8;

            else if ("WXYZ".Contains(c))

                return 9;

            return null;

        }

    }

}
  1. Adım : Translate butonunu bağlanma

MainActivity sınıfı içerisinde OnCreate metotunu bulunuz. Button kodunu OnCreate içerisine ekleyelim.

Aşağıdaki kodu ekleyiniz.

// Get our UI controls from the loaded layout

            EditText phoneNumberText = FindViewById<EditText>(Resource.Id.editText1);

            TextView translatedPhoneWord = FindViewById<TextView>(Resource.Id.TranslatedPhoneword);

            Button translateButton = FindViewById<Button>(Resource.Id.TranslateButton);

// Add code to translate number

translateButton.Click += (sender, e) =>

{

    // Translate user's alphanumeric phone number to numeric

    string translatedNumber = Core.PhonewordTranslator.ToNumber(phoneNumberText.Text);

    if (string.IsNullOrWhiteSpace(translatedNumber))

    {

        translatedPhoneWord.Text = string.Empty;

    }

    else

    {

        translatedPhoneWord.Text = translatedNumber;

    }

};

OnCreate metotunun son hali aşağıdaki gibidir.

protected override void OnCreate(Bundle savedInstanceState)

        {

            base.OnCreate(savedInstanceState);

            Xamarin.Essentials.Platform.Init(this, savedInstanceState);

            // Set our view from the "main" layout resource

            SetContentView(Resource.Layout.activity_main);


            // Get our UI controls from the loaded layout

            EditText phoneNumberText = FindViewById<EditText>(Resource.Id.editText1);

            TextView translatedPhoneWord = FindViewById<TextView>(Resource.Id.TranslatedPhoneword);

            Button translateButton = FindViewById<Button>(Resource.Id.TranslateButton);

            // Add code to translate number

            translateButton.Click += (sender, e) =>

            {

                // Translate user's alphanumeric phone number to numeric

                string translatedNumber = Core.PhonewordTranslator.ToNumber(phoneNumberText.Text);

                if (string.IsNullOrWhiteSpace(translatedNumber))

                {

                    translatedPhoneWord.Text = string.Empty;

                }

                else

                {

                    translatedPhoneWord.Text = translatedNumber;

                }

            };

        }

Uygulamamızın ismini ayarlayalım.values dosyasını genişletelim. strings.xml dosyasını açınız.

<resources>

    <string name="app_name">Phone Word</string>

    <string name="action_settings">Settings</string>

</resources>

Projeyi build ediniz. Ardından Start ediniz.

How to deserialize json data to Dictionary object

How to deserialize json data to Dictionary object

Install Newtonsoft.Json JSON framework using Nuget Package Manager

Send JSON string as shown below.

string json = "{\"id\":\"12345\",\"name\":\"Mike\", \"lastName\":\"Donald\",\"age\":32, address: {id: \"67890\", name: \"New York City\",}}";

I will show you how to do this via Console Application.

Create a Console Application named ConsoleApplication1 as default. Then paste the following code.

namespace ConsoleApplication1
{
    class Program
    {
        static void Main(string[] args)
        {
            string json = "{\"id\":\"12345\",\"name\":\"Mike\", \"lastName\":\"Donald\",\"age\":32, address: {id: \"67890\", name: \"New York City\",}}";

            Class1 class1 = new Class1();
            class1.DeserializeToDictionary(json);
        }
    
    }
}

Create a new class named Class1 as default. Then paste the following code.

		
using Newtonsoft.Json;
using Newtonsoft.Json.Linq;
using System.Collections.Generic;

namespace ConsoleApplication1
{
    public class Class1
    {
        public Dictionary DeserializeToDictionary(string json)
        {
            var rtrn = new Dictionary();

            var data = JsonConvert.DeserializeObject<Dictionary>(json);

            foreach(KeyValuePair obj in data)
            {
                if(obj.Value is JObject)
                {
                    rtrn.Add(obj.Key, DeserializeToDictionary(obj.Value.ToString()));
                }
                else
                {
                    rtrn.Add(obj.Key, obj.Value);
                }
            }

            return rtrn;
        }
    }
}

When you debug your code, you can see an output as shown below.

Output :

Angular 7 Example

I start this tutorial by installing Angular using Angular CLI

I assume you have installed an Angular CLI

If it’s not in your machine, run the following command.

npm install -g @angular/cli

And then create a boilerplate project by running the following command.

ng new testAngular

go into the project folder

cd testAngular

open the project in your editor. I’m using Visual Studio Code.

code .

Start the project by running the following command.

ng serve --open

Install Bootstrap in your app. Go to your root. Run the following code.

npm add bootstrap

Copy the bootstrap.min.css file from \node_modules\bootstrap\dist\css to \src\assets\css folder.

If the CSS is not there, then create a folder named “css”.

Add the link of that CSS file inside src > index.html as you can see.

<!doctype html>
<html lang="en">
<head>
  <meta charset="utf-8">
  <title>TestAngular</title>
  <base href="/">

  <meta name="viewport" content="width=device-width, initial-scale=1">
  <link rel="icon" type="image/x-icon" href="favicon.ico">
  <link href="/assets/css/bootstrap.min.css" rel="stylesheet" type="text/css" />
</head>
<body>
  <app-root></app-root>
</body>
</html>

Create two components named “home” and “employees” by running the following command

ng g c home
ng g c employees

Angular automatically update the app.module.ts file.

import { BrowserModule } from '@angular/platform-browser';
import { NgModule } from '@angular/core';

import { AppRoutingModule } from './app-routing.module';
import { AppComponent } from './app.component';
import { HomeComponent } from './home/home.component';
import { EmployeesComponent } from './employees/employees.component';

@NgModule({
  declarations: [
    AppComponent,
    HomeComponent,
    EmployeesComponent
  ],
  imports: [
    BrowserModule,
    AppRoutingModule
  ],
  providers: [],
  bootstrap: [AppComponent]
})
export class AppModule { }

Modify the app-routing.module.ts file as follows

import { NgModule } from '@angular/core';
import { Routes, RouterModule } from '@angular/router';
import { HomeComponent } from './home/home.component';
import { EmployeesComponent } from './employees/employees.component';
const routes: Routes = [
  { path: 'home', component: HomeComponent },
  { path: 'employees', component: EmployeesComponent }
];

@NgModule({
  imports: [RouterModule.forRoot(routes)],
  exports: [RouterModule]
})
export class AppRoutingModule { }

As you can see, I have the Routes, RouterModule module. I have populated the routes array.

Exporting RouterModule provides router directives.

<router-outlet></router-outlet>

router-outlet is a component that is used to load the different components dynamically based on the activated component. It is inside the app.component.html file.

I define a navbar to display the output of the different routes. Inside the app.component.html file, add the following code.

< div id="app">
  < nav class="navbar navbar-expand-sm bg-light">
      < ul class="navbar-nav">
      < li class="nav-item">
          < a routerLink="/home" class="nav-link">Home</a>
      < /li>
      < li class="nav-item">
          < a routerLink="/employees" class="nav-link">Employees</a>
      < /li>
      < /ul>
  < /nav>
  < div class="container">
      < router-outlet></router-outlet>
  < /div>
< /div>

I will prepare the fake data using a package called json-server. Run the following commandto install the json-server package.

npm install -g json-server

I will create a folder named “data” inside the src directory and create a file named db.json inside that.

{
    "results": [
    {
        "id": "1",
        "name": "Cihan",
        "company": "ABC"
    },
    {
        "id": "2",
        "name": "John",
        "company": "DEF"
    },
    {
        "id": "3",
        "name": "Robert",
        "company": "XYZ"
    }]
}

That’s OK. Start the JSON Server by running the following command.

json-server --watch src/data/db.json --port 3000

http://localhost:3000/results

Angular has HttpClientModule module. Let us configure inside the app.module.ts file.

import { HttpClientModule } from '@angular/common/http';
imports: [
  BrowserModule,
  AppRoutingModule,
  HttpClientModule
]

Create a file named Employee.ts inside the employees folder. Type the following code in that.

export interface Employee {
  id: Number;
  name: String;
  company: String;
}

Create a file named employee.service.ts inside the employees folder. In that file, I’m writing the network request code.

import { Injectable } from '@angular/core';
import { HttpClient } from '@angular/common/http';

@Injectable()
export class EmployeeService {
  constructor(private http: HttpClient) { }
  url = 'http://localhost:3000';
  getEmployees() {
    return this
            .http
            .get(`${this.url}/results`);
        }
}

Then I import this file inside the employees.component.ts file. Then I call the service as follows.

import { Component, OnInit } from '@angular/core';
import { EmployeeService } from './employee.service';
import { Employee } from './employee';

@Component({
  selector: 'app-employees',
  templateUrl: './employees.component.html',
  styleUrls: ['./employees.component.css']
})
export class EmployeesComponent implements OnInit {

  employees: Employee[];
  constructor(private employeeService: EmployeeService) { }

  ngOnInit() {
    this.employeeService.getEmployees().subscribe((data: Employee[])=>{
      this.employees = data;
    });
  }

}

Display that data inside the employees.component.html file.

<table class="table table-striped">
  <thead>
    <tr>
      <th>ID</th>
      <th>Name</th>
      <th>Company</th>
    </tr>
  </thead>
  <tbody>
    <tr *ngFor="let employee of employees">
      <td>{{ employee.id }}</td>
      <td>{{ employee.name }}</td>
      <td>{{ employee.company }}</td>
    </tr>
  </tbody>
</table>

Finally I will declare the EmployeeService service as a provider inside the app.module.ts file.

import { EmployeeService } from './employees/employee.service';
providers: [EmployeeService]

NativeScript – Lesson 1

You can create Native IOS and Android Apps with Javascript.

Native Script is a open source framework for building native mobile apps with Angular, Vue.js, TypeScript, or Javascript.

Get Started

Click https://www.nativescript.org

Click the “Start coding today” option on the web site clicked

NativeScript

You must choose one of them. I’m going to use the Angular framework.


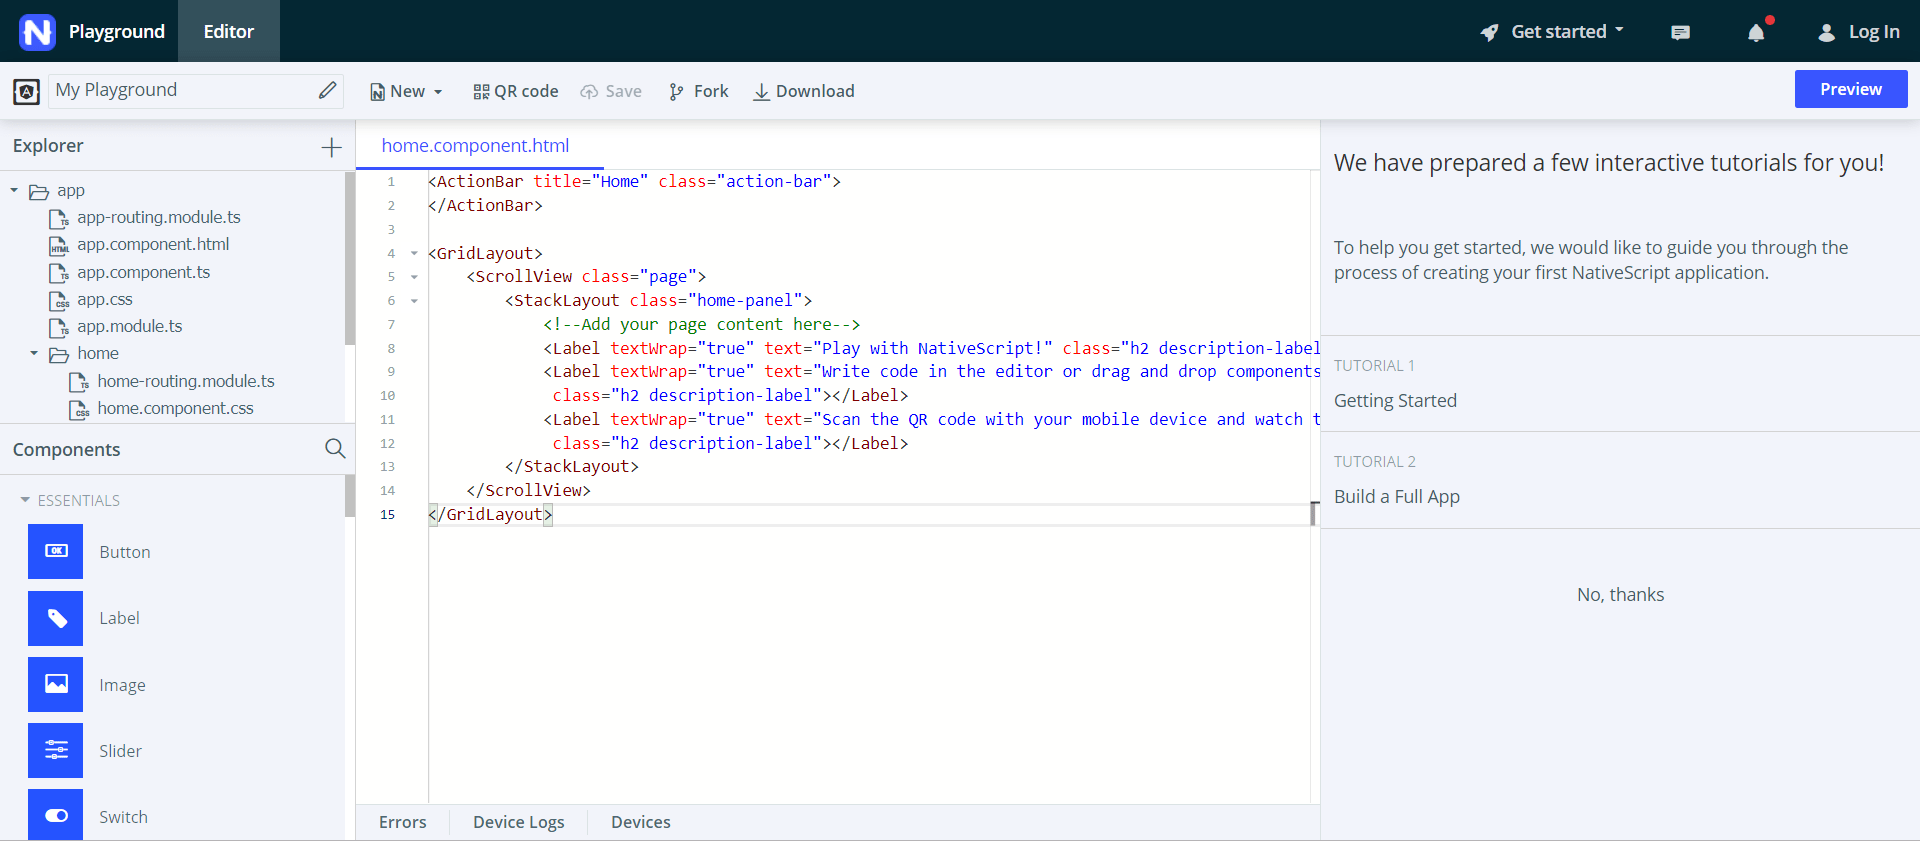
You have to see the screen as shown below.

NativeScript-Playground


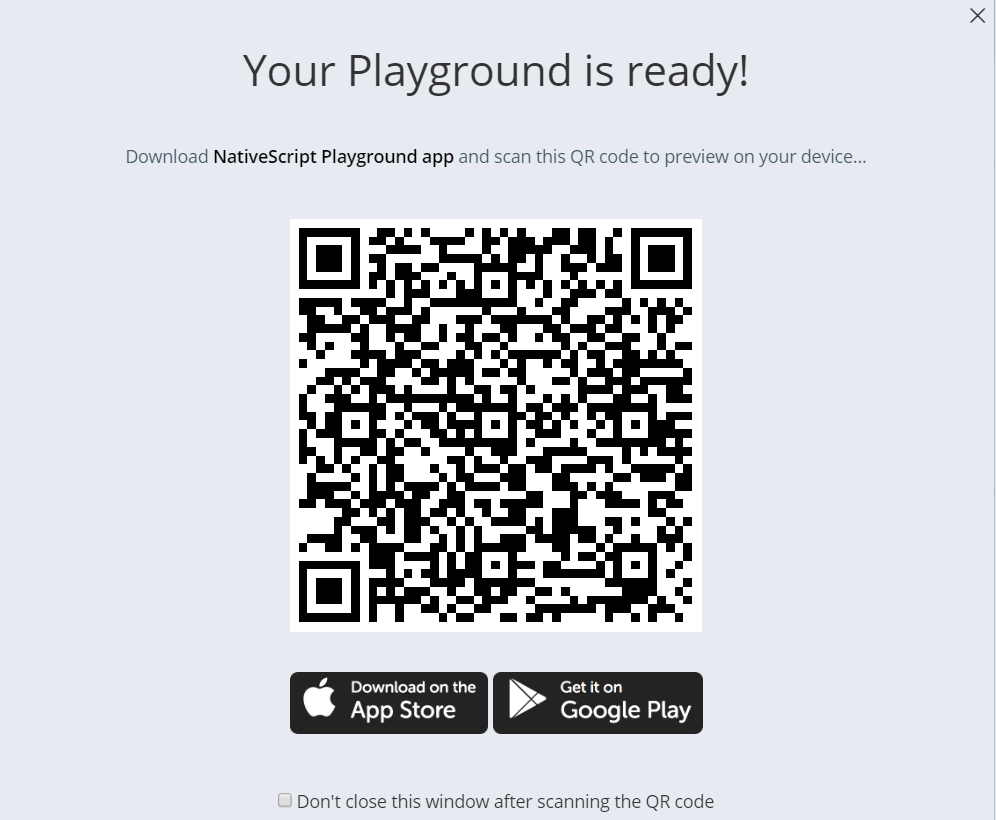
Click the “Preview” button.


NativeScript-Playground-1


You must download two apps NativeScript Playground and NativeScript Preview on your device.


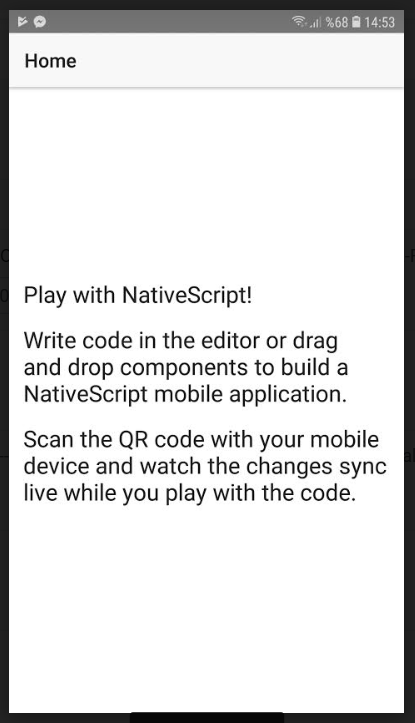
On your device, you will see an application like the below image after scanning the QR code.


NativeScript-Playground-2

C# SqlCommand Example


private string connectionString = WebConfigurationManager.AppSettings["connectionString"];

public rmtoken ReadTokenFromDB(string eftkodu, string scope, int wsauthority)
{
    try
    {
        rmtoken rmtoken = new rmtoken();
        using (SqlConnection con = new SqlConnection(connectionString))
        {
            con.Open();
            SqlCommand cmd = new SqlCommand("select access_token, expires_in, refresh_token, tokendate from rmtoken where eftkodu='" + eftkodu
                + "' and scope='" + scope + "' and wsauthority=" + wsauthority.ToString(), con);
            SqlDataReader dataReader = cmd.ExecuteReader();
            if (dataReader.Read())
            {
                rmtoken.access_token = dataReader["access_token"].ToString();
                rmtoken.expires_in = Convert.ToInt32(dataReader["expires_in"]);
                rmtoken.refresh_token = dataReader["refresh_token"].ToString();
                rmtoken.tokendate = Convert.ToDateTime(dataReader["tokendate"]);
            }
            cmd.Dispose();
            con.Close();
        }
        return rmtoken;
    }
    catch
    {
        //log
        return null;
    }
}